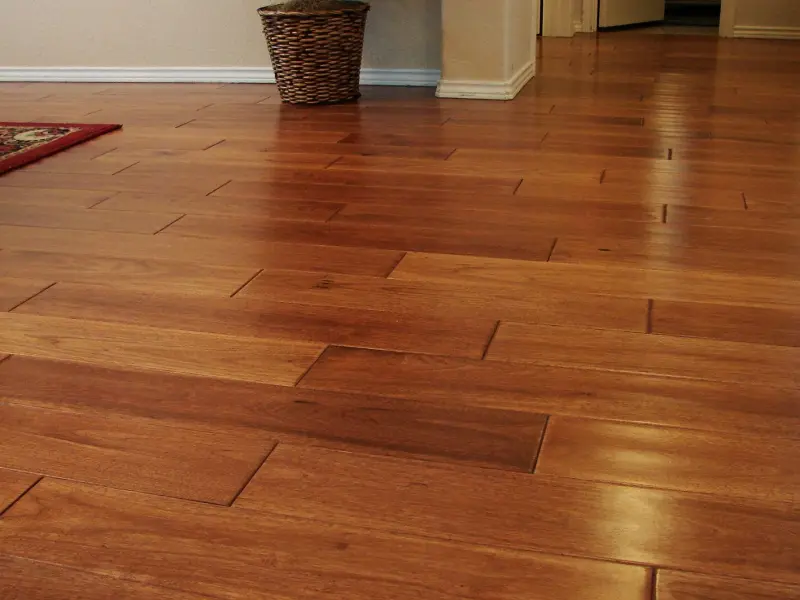
Squeaks almost always come from movement: a board rubbing against its neighbor, or the subfloor sliding up and down a nail when you step on it. If you have an unfinished basement, the classic fix is to drive shims or screws from below. But on a second floor, over a finished ceiling, or on a slab, you have to work from the top. The methods below get the job done with small holes you can fill so they are hard to spot.
Why Floors Squeak
Before choosing a fix, it helps to know what you're dealing with.
- Board-against-board squeaks happen when two strips of flooring rub along their tongue-and-groove edges. The noise is usually a short, high chirp, and it often gets worse in winter when the wood dries and shrinks.
- Subfloor squeaks come from the plywood or plank subfloor lifting slightly off a joist, then rubbing on the nails as it's pushed back down. These tend to be lower and creakier, and you may feel a little give underfoot.
- Seasonal squeaks come and go with humidity. If your floor is quiet all summer and noisy all winter, try a humidifier before you drill anything. Most wood floors are happiest at roughly 35 to 55 percent relative humidity.
What You'll Need
- Powdered graphite or talcum powder
- A soft brush or an old paintbrush
- Stud finder that can detect joists through flooring (or a strong magnet to find existing nails)
- Drill/driver with a countersink bit
- A squeak-repair kit designed for hardwood (it includes a depth-control jig and scored screws that snap off below the surface), roughly $20 to $35
- Or: 2-inch trim-head screws and a 1/16- to 3/32-inch drill bit
- Wood filler or color-matched wax filler sticks
- Painter's tape and a pencil
- Safety glasses
Step 1: Map the Squeaks
Work with a helper. One person walks slowly across the floor in socks while the other kneels nearby and listens. Put a piece of painter's tape on every spot that makes noise. You will usually find the squeaks cluster in lines that follow the joists or run along a single board.
Next, find the joists. In most American houses, floor joists run perpendicular to the flooring strips and sit 16 inches apart on center, sometimes 12 or 24 inches. A deep-scanning stud finder often works through 3/4-inch hardwood plus subfloor; if yours struggles, look for the rows of flooring nails or nail holes along the face of the boards, or use a strong magnet to find them. Once you find one joist, measure 16 inches to find the next, and confirm. Mark each joist line with tape.
Step 2: Try Powder First
For a board-to-board squeak, start with the simplest fix. Sprinkle powdered graphite or talcum powder over the squeaky seam, then work it into the joint with a soft brush. Lay a towel over the area and walk back and forth on it to drive the powder deeper. Vacuum up the excess.
This lubricates the edges so they slide silently instead of chirping. It can last for months, sometimes much longer. Graphite is gray, so test it on a dark or out-of-sight seam first; talc is invisible on most finishes. Don't use oil or liquid lubricant, which can stain the wood and attract dirt.
Step 3: Screw the Floor Down to a Joist
If powder doesn't help or the floor flexes when you step on it, the fix is to pull the subfloor and flooring tight against the joist.
With a squeak-repair kit:
- Place the kit's depth jig over the squeak, directly on a marked joist line.
- Drive the special scored screw through the jig. It passes through the hardwood and subfloor and bites into the joist. The jig stops it at the right depth.
- Rock the screw side to side with the jig's tool until the head snaps off at the scored point, just below the surface of the wood.
- Fill the tiny hole with a matching wax filler stick or wood putty and buff it flush.
With trim-head screws:
- Drill a pilot hole through the hardwood at the squeak, over the joist, angled slightly. A pilot hole keeps oak and maple from splitting.
- Countersink lightly so the screw head can sit about 1/16 inch below the surface.
- Drive a 2-inch trim-head screw through the flooring and subfloor into the joist. The screw should pull the layers together. Stop as soon as the head is below the surface; overdriving can crack the board.
- Fill with color-matched putty or a wax stick.
Step on the spot to test. If the squeak moved a few inches, add another screw. Two screws 6 inches apart usually take care of a single board.
Step 4: For Squeaks Between Joists
Sometimes the squeak sits in the middle of a span, not over a joist. Here, the subfloor itself isn't the issue; it's usually a strip of flooring that isn't held down well. Drive a pair of finish nails at opposing angles through the board into the subfloor, forming a V. Use 6d or 8d finishing nails or a pneumatic finish nailer, predrill for hardwood, set the heads below the surface, and fill. The crossed angles lock the board in place far better than a single straight nail.
Step 5: Carpeted or Engineered Floors
If the squeaky floor is carpeted, special kits drive a screw through the carpet and pad into the joist, then snap the head off below the pad so the carpet fibers close over it. On floating engineered or laminate floors, screwing down is not an option because those floors are designed to move; instead, check for a bumpy subfloor or missing expansion gaps around the edges.
Safety Notes
Before drilling into any floor, think about what's underneath. Water lines, drain pipes, heating ducts and electrical cable often run between joists, and sometimes through them. Keep screws short (2 inches is plenty for 3/4-inch flooring on 3/4-inch subfloor), drive into the center of the joist, and if a bathroom or kitchen is directly above or below, be extra careful. Wear safety glasses when snapping off screw heads.
Tips
- Work in small batches. Fix the worst three squeaks first, live with it for a week, and see what's left.
- Keep the room's humidity steady. A dry winter house will reopen gaps and start new squeaks.
- Buy a filler kit with several shades and blend them to match your floor's grain.
- If an entire area feels bouncy, not just noisy, that may be a structural issue with the joists. It's worth having a contractor look before you put screws in everything.
The Takeaway
Most squeaks can be quieted from above in an afternoon: powder for chirping seams, a screw into the joist for loose subfloor, and angled nails for boards between joists. Start with the least invasive fix and work up. The holes you make are smaller than a pencil lead once filled, and the quiet is worth it every time you get up for a glass of water at night.