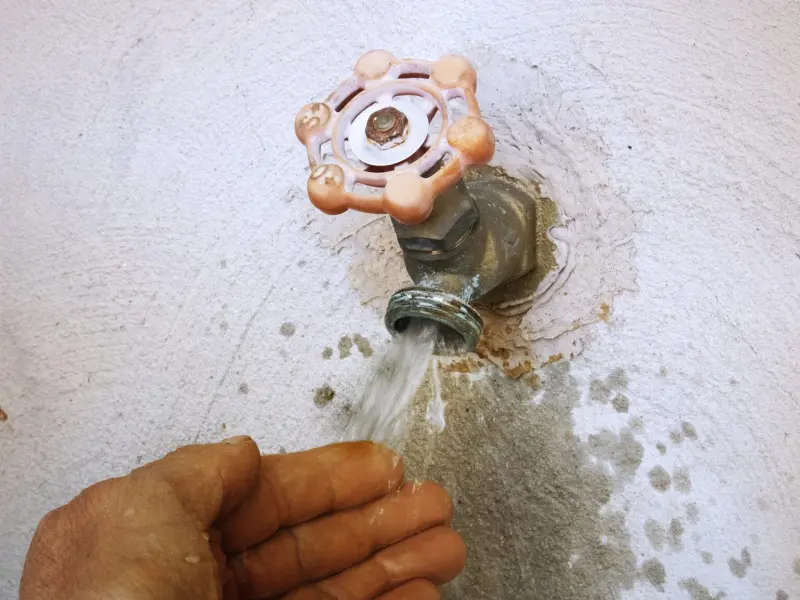
The short version: take the hose off every outdoor faucet before the first night in the mid-20s. If the faucet is a standard hose bib, also close its indoor shutoff valve, open the outdoor handle, and drain the line. Leave the outdoor handle open until spring. That is about 20 minutes of work per house, and it prevents a split pipe that can leak into a wall or basement the first time you turn the faucet on in April.
The rest of this guide explains which steps apply to your faucet and how to check that it worked.
Do You Need to Do This at All?
If your area regularly sees overnight lows below about 28°F, yes. That covers most of the country north of the Gulf Coast and the low deserts, plus higher elevations everywhere.
In warmer places, such as coastal California, south Florida and the Gulf Coast, hard freezes are rare. Disconnecting the hose and keeping a foam cover on hand for a cold snap is usually enough. Rare freezes still do damage there, because homes in mild climates often have plumbing in exterior walls and attics with little insulation.
Step 1: Figure Out Which Faucet You Have
There are two common types, and they look nearly identical from the outside.
Standard hose bib, also called a compression faucet. The valve that stops the water sits right behind the handle, outside the wall. The pipe feeding it stays full of water all the way to the outside, so it needs an indoor shutoff to be safe in a freeze.
Frost-free sillcock. The valve seat sits at the end of a long tube, commonly 6 to 14 inches and sometimes longer, that reaches through the wall into heated space. When you close the handle, water stops inside the house and the tube drains out through the spout. They are common in newer houses in cold climates.
How to tell them apart:
- Go inside to the spot directly behind the faucet, usually in a basement, crawlspace or utility room. A long brass or copper body running straight through the wall to the faucet means frost-free. A regular pipe, often with a small separate valve a few feet back from the wall, means a standard bib.
- From outside, a frost-free sillcock usually has a raised vacuum breaker cap on top and a handle that needs several full turns to close.
- If you cannot see the plumbing because the basement is finished, assume it is a standard bib and look for a shutoff valve behind an access panel or ceiling tile near that wall.
Step 2: Disconnect Every Hose (All Faucet Types)
This is the step most often skipped, and it is the one that ruins frost-free faucets. A connected hose traps water in the end of the long tube so it cannot drain. When that water freezes, it can split the tube inside the wall, which is exactly what the frost-free design is meant to prevent. The faucet may then work normally in spring while leaking into the wall behind it.
Remove the hose and any splitter, timer, pressure regulator or quick-connect fitting. Drain the hose by walking it out down a slope, then coil it and store it in a garage or shed.
For frost-free faucets, that is nearly the whole job. Close the handle, then go to Step 5 to check the slope.
Step 3: Close the Indoor Shutoff (Standard Bibs)
Trace the pipe back from the wall until you find a valve, usually within a few feet. It will be one of two kinds:
- Gate or globe valve with a round wheel handle. Turn it clockwise until it stops. Do not force an old valve past firm resistance; a wheel valve that has not moved in years can break its stem.
- Ball valve with a lever handle. Turn it a quarter turn so the lever sits across the pipe.
No shutoff anywhere on the line? Some older houses have none. For this winter, put an insulated cover on the faucet and, on the coldest nights, let the outdoor faucet run at a slow, steady drip. Then have a plumber add a valve or replace the bib with a frost-free sillcock before next fall. Expect roughly $150 to $350 for adding a shutoff and about $200 to $500 to replace a bib with a frost-free sillcock, depending on access and region (approximate 2026 prices).
Step 4: Open the Outdoor Faucet and Drain the Line
Go outside and open the faucet fully. A little water will run and stop. Leave it open all winter. An open faucet lets any remaining water push out instead of bursting the pipe as it freezes.
Back inside, look at the shutoff valve for a small brass cap on its side, called a bleeder or drain cap. Hold a bucket under it and unscrew it slowly. You should hear air pull in through the open outdoor faucet, and a cup or two of water will run out. When the dripping stops, thread the cap back on loosely or put it somewhere you will find it in spring. If it is stuck, a gentle turn with pliers usually frees it. Stop if the valve body starts to turn with the cap.
No bleeder cap? The section of pipe between the valve and the wall may hold some water. An insulated cover outside helps most in this case.
Step 5: Check the Slope on Frost-Free Faucets
A frost-free sillcock only drains if it slopes slightly downward toward the outside. Look at it from the side, or set a short torpedo level on the body inside. If it tilts back toward the house, water collects in the tube and can freeze even with the valve indoors.
Sometimes you can loosen the screws on the outside mounting flange and reset the faucet with a slight downward pitch. If the pipe is soldered at a fixed angle, have a plumber correct it.
While you are there, check the vacuum breaker cap on top. Steady dripping from it when the faucet is off usually means a worn seal. Replacement repair kits are inexpensive.
Step 6: Covers and Pipe Insulation
An insulated faucet cover, about $3 to $10, is a foam or fabric dome that hooks over the faucet and cinches tight to the siding. It will not protect a standard bib that still has water in the line, but it adds margin on windy, bitter nights. Make sure the foam edge sits flat against the wall so wind cannot get underneath.
Inside, if the supply pipe runs through an unheated crawlspace, an attached garage or near a foundation vent, slip foam pipe insulation over it and tape the seams.
How to Tell It Worked
- Standard bib: after closing the indoor valve and opening the outdoor faucet, no water should come out of the spout after the first few seconds. If water keeps flowing, the shutoff valve is leaking through and should be repaired or replaced.
- Frost-free sillcock: with the hose off and the handle closed, the spout should drip briefly and then stay dry.
Spring: Turn It Back On and Check for Damage
- Close the bleeder cap.
- Close the outdoor faucet.
- Slowly open the indoor valve.
- Have someone stand inside near where the pipe enters the house while you open the outdoor faucet.
- Watch the wall, the ceiling below and the floor for a full minute.
If water shows up indoors, the flow outside is weak, or you hear water running inside the wall, close the indoor valve immediately. A split frost-free tube usually means replacing the whole sillcock. Catching it in the first minute keeps it a plumbing repair rather than a drywall and flooring repair.
Easy Things to Miss
- The second or third faucet. Many houses have one on the side or back too. Walk the whole outside.
- Irrigation systems. An in-ground sprinkler system needs its own winterization, usually a compressed-air blowout. Sprinkler companies commonly charge about $75 to $150 for a typical residential system (approximate).
- The attached garage. It can drop below freezing on the coldest nights, so pipes on its outside walls are at risk.
- Labeling. Hang a tag on the indoor valve that reads "Outdoor faucet: closed for winter." It saves guessing in April.
If cold air is also getting into the house, our guide to replacing weatherstripping on an exterior door is a good next project for the same weekend.
The one thing to remember: no hose stays connected over the winter, frost-free or not.