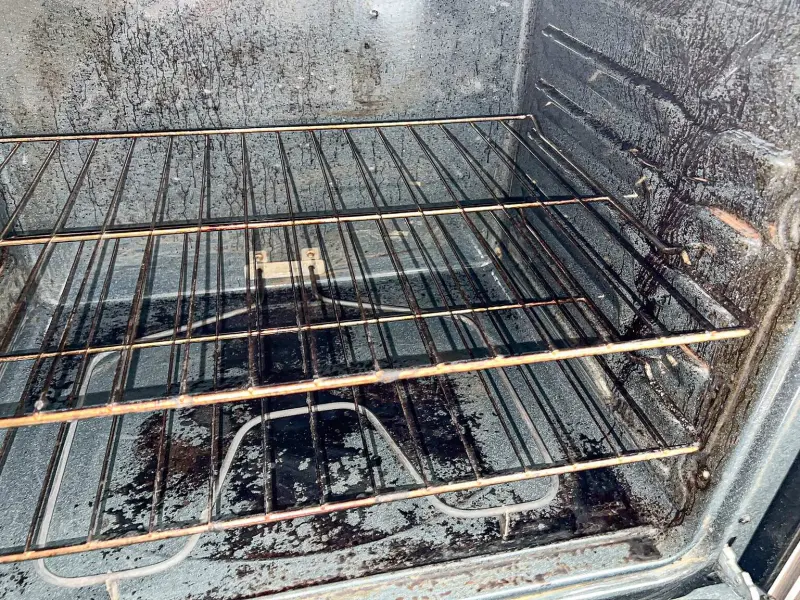
Most ovens get cleaned the same way: someone notices smoke during a holiday roast, sprays a can of lye-based cleaner, and spends the next hour with every window open. There is a slower, gentler route that works on all but the worst buildup. It takes about 20 minutes of actual effort spread across two days, and the main ingredient costs about a dollar.
Why Skip the Heavy-Duty Spray?
Conventional oven cleaners rely on sodium hydroxide (lye) to dissolve grease. They work fast, but they are caustic to skin and eyes, the fumes are harsh in a closed kitchen, and the residue has to be rinsed thoroughly before you cook again. Many manufacturers also warn against using them on the enamel interior of a self-cleaning oven, because the chemicals can damage the special coating.
Baking soda is mildly alkaline. Given enough time, it softens carbonized grease so it wipes away instead of needing to be chiseled off. The trade-off is patience: the paste needs at least 8 hours, and overnight is better.
What You'll Need
- 1 cup baking soda (a second cup for very dirty ovens)
- Water
- White vinegar in a spray bottle (5% acidity, the standard grocery-store kind)
- A plastic scraper, old gift card, or silicone spatula
- Non-scratch scrub sponges and two or three microfiber cloths
- Rubber gloves
- A small bowl and a silicone brush or your gloved hands for spreading
- Dish soap and a bathtub or large utility sink for the racks
- An old towel or two
Step 1: Turn the Oven Off and Let It Cool Completely
This sounds obvious, but a warm oven bakes the paste onto the walls instead of letting it work. Wait until the interior is cool to the touch. For an electric oven, there is no need to cut power at the breaker for this method, but do make sure every knob is in the off position. For a gas oven, keep paste away from the burner ports and the igniter in the floor or back of the cavity.
Pull out the racks, thermometer, pizza stone, and anything else inside.
Step 2: Start the Racks Soaking
Racks take the longest, so get them going first. Lay an old towel in the bottom of the bathtub to protect the finish, set the racks on top, and fill with enough hot water to cover them. Add about 1/2 cup of dish soap and swish it around. Some people add a few dryer sheets; they do seem to loosen grease, but plain soap and hot water handle most of the work if you give it time.
Leave them overnight alongside the oven paste.
Step 3: Mix and Apply the Paste
In a bowl, mix 1/2 cup baking soda with about 3 tablespoons of water. You want something like frosting: thick enough to stick to a vertical wall, not runny. Add water a teaspoon at a time until it spreads easily. For a large or very greasy oven, double the batch.
Wearing gloves, spread the paste over the bottom, sides, back, and inside of the door. Go heavier on dark, crusty spots. The paste will turn brown in places as it contacts grease, which is normal.
Keep it off:
- Exposed heating elements in electric ovens
- The gas burner ports and igniter
- The rubber or fiberglass door gasket around the opening
Close the door and leave it for 8 to 12 hours.
Step 4: Scrape and Wipe
The next day, use a plastic scraper to lift the dried paste and the softened grease beneath it. Work from the top of the walls down so debris falls to the floor of the oven, then scoop it out. Follow with a damp microfiber cloth, rinsing it often in a bucket of warm water.
You will notice a white film left behind. That is baking soda residue, and the next step deals with it.
Step 5: Spray Vinegar to Lift the Residue
Mist the remaining film with white vinegar. It will foam as the acid reacts with the leftover baking soda, which helps loosen the last bits. Wipe again with a clean, damp cloth. Repeat until the cloth comes away clean, usually two or three passes.
Never combine vinegar with a bleach-based cleaner in the same session. The mixture releases chlorine gas, and that is far worse than any oven cleaner fumes.
Step 6: Clean the Door Glass
The inside of the door glass often holds the worst brown streaks. Apply a fresh, thinner layer of paste just to the glass, let it sit 20 to 30 minutes, then scrub with a non-scratch sponge in small circles. Wipe clean and finish with a vinegar spray and a dry cloth for a streak-free look.
If you see grease between the two panes of glass, that is inside the door assembly. Some doors can be disassembled with a screwdriver following the owner's manual, but for most people it is not worth the risk of misaligning the hinges.
Step 7: Finish the Racks
Drain the tub and scrub each rack with a non-scratch sponge or a stiff nylon brush. For stubborn spots, sprinkle dry baking soda directly on the wet rack and scrub again. Rinse well, dry with a towel, and slide them back in.
Rinse and wipe the tub promptly, since greasy water can leave a ring.
Step 8: Run a Quick Heat Cycle
Before cooking, set the oven to about 250°F for 15 minutes with the door closed. This dries the interior and burns off any trace of moisture. You should smell nothing beyond a faint warm-oven scent.
What Not to Use on a Self-Cleaning Oven
Self-cleaning ovens have a porous enamel coating designed to handle the cycle's extreme heat, which runs roughly 800 to 900°F. That coating is easy to damage:
- No commercial lye cleaners inside the cavity unless your manual specifically allows it.
- No steel wool or abrasive scouring powder. They scratch the enamel and make future buildup stick harder.
- No scrubbing the door gasket. It is woven fiberglass on many models, and once frayed it lets heat escape.
- No racks inside during the self-clean cycle, unless the manual says your racks are rated for it. High heat discolors chrome racks and can make them stick in the side supports.
If you do use the self-clean cycle, run it on a day you can ventilate, remove pets (especially birds, which are sensitive to the fumes from heated coatings), and stay home while it runs. Many technicians also recommend not running it right before a big holiday, because the extreme heat occasionally takes out a control board or thermal fuse at the worst possible time.
Tips for Keeping It Clean Longer
- Use a sheet pan below messy dishes. Lasagna, fruit pies, and roasts that splatter are responsible for most baked-on spills. A rimmed sheet pan on the rack below catches drips.
- Deal with fresh spills once the oven cools. A damp cloth with a sprinkle of baking soda removes a new spill in seconds. The same spill, baked five more times, takes an overnight soak.
- Skip oven-floor liners unless your manual approves them. On many ovens, a liner on the floor blocks airflow or covers a hidden bake element and can melt.
- Plan a deep clean about every three to six months, depending on how often you roast and bake. Monthly wipe-downs make each deep clean faster.
Common Mistakes
The most frequent problem is pulling the paste too early. Two or three hours will remove light grime but leave the hard brown spots behind. The second is using too much water while wiping, which turns the leftover paste into a gritty slurry that is hard to remove. Wring your cloths well and rinse them often.
The Bottom Line
An overnight baking soda paste, a vinegar rinse, and a long soak for the racks will get most home ovens close to new without filling the house with fumes. Put it on your calendar for a quiet weekday evening, and the next morning's cleanup takes less time than a pot of coffee. Once the oven is done, the stovetop drip pans and range hood filter are natural next targets.