Solid wood chairs turn up at thrift stores, yard sales, and estate sales every weekend, often for $10 to $25, and many of them are better built than what you can buy new at that price. A worn finish, a few water rings, and a little wobble are easy fixes. This guide walks through the full process, from checking a chair before you buy it to the last coat of finish, along with an honest look at when paint is the smarter choice.
Before You Buy: A Two-Minute Inspection
Not every cheap chair is a bargain. Flip it over and check:
- Is it solid wood? Look at the edge of the seat and the underside. Veneer shows as a thin layer over a different core, and particleboard looks like compressed chips. Solid wood can be sanded; thin veneer and laminate cannot be sanded much.
- How are the joints made? Mortise-and-tenon or dowel joints with corner blocks screwed underneath are a good sign. Loose joints are fixable; cracked legs or split seats are harder.
- What is the current finish? Rub an inconspicuous spot with a cotton ball dampened with denatured alcohol. If the finish softens and gets sticky, it is likely shellac. If lacquer thinner softens it instead, it is lacquer. If neither touches it, it is probably polyurethane or a catalyzed finish, which takes chemical stripper or more sanding.
- Is there old paint? Chairs from before 1978 may have lead-based paint. Test with an EPA-recognized lead test kit, about $10 to $30 at hardware stores, before you sand. If it tests positive, do not dry-sand or heat-strip it.
Stain or Paint?
This is the first real decision.
Stain or a clear finish makes sense when the chair is a nice hardwood like oak, maple, cherry, or walnut, the grain is attractive, and the old finish comes off cleanly.
Paint makes more sense when the chair has mismatched wood species, heavy repairs, wood filler, lots of tight spindles and carvings that are miserable to strip, or a previous coat of paint deep in the grain. Paint also covers stains that would show through a clear finish. A painted chair still needs proper prep, but you can skip full stripping.
What You'll Need
- Chemical stripper (a gel or paste type clings to vertical surfaces), plus a plastic scraper and brass or nylon brushes
- Mineral spirits and #0000 steel wool or synthetic abrasive pads
- Sandpaper in 100, 150, and 220 grit, plus a sanding sponge for curves
- Wood glue (a standard yellow PVA glue works for most repairs), clamps, and a rubber mallet
- Wood filler or stainable putty
- Pre-stain wood conditioner (for pine, maple, birch, and cherry)
- Oil-based or water-based stain, and a clear topcoat (wipe-on polyurethane is the easiest for chairs)
- For painting: a bonding primer and a durable enamel such as a water-based alkyd
- Chemical-resistant nitrile gloves, safety glasses, and a respirator rated for organic vapors
- Drop cloth and plenty of lint-free rags
Step 1: Fix the Wobble First
Refinishing a chair that rocks is wasted effort. Turn the chair upside down and test each joint by gently twisting. If a rung or stretcher moves, it needs regluing.
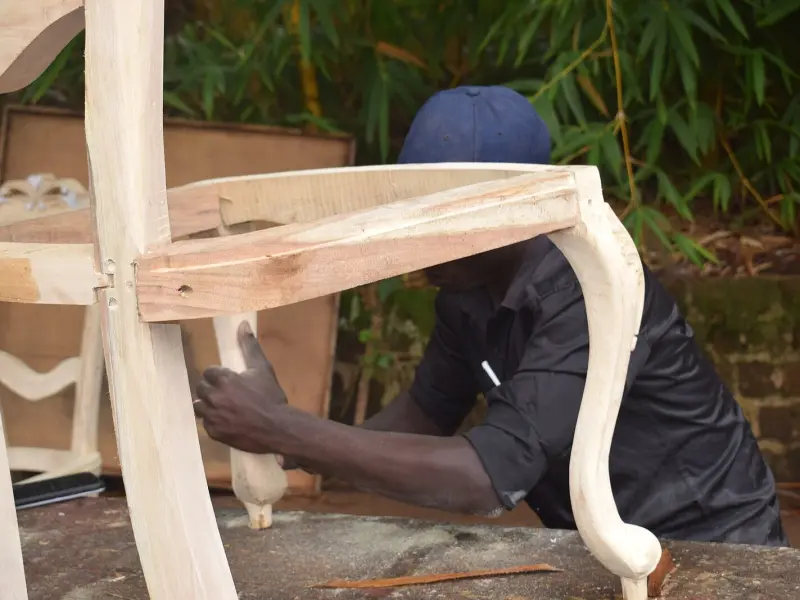
Carefully tap the loose joint apart with a rubber mallet, scrape or sand the old dried glue off both parts, apply fresh wood glue, and reassemble. Clamp the joint with a bar clamp or a ratchet strap wrapped around the legs, then wipe away squeeze-out with a damp rag. Leave it clamped for at least an hour and let the glue cure for 24 hours before stressing it.
If the chair has corner blocks under the seat, back the screws out, reglue the blocks, and drive the screws back in. Joints that cannot come apart can be helped with a glue syringe forced into the gap, though that is a less permanent fix.
Step 2: Strip the Old Finish
Work outdoors or in a garage with the door open and a fan pulling air outward. Wear gloves, eye protection, and a respirator, and read the stripper's label carefully. Keep stripper away from pets and children.
- Brush on a thick coat of stripper, working one section at a time, such as the seat, then the back, then the legs.
- Wait the time on the label, usually 15 to 30 minutes for gel strippers and longer for low-odor formulas. The finish will bubble or wrinkle.
- Scrape flat areas with a plastic scraper, going with the grain. Use a brass brush or nylon brush on turned legs and spindles, and a dental pick or sharpened dowel in carvings.
- Repeat on any spots where old finish remains.
- Wipe the entire chair with mineral spirits or the cleanup product recommended on the stripper label, using steel wool or an abrasive pad to lift the last residue. Let it dry overnight.
Dispose of the stripper sludge according to local rules for hazardous household waste.
Step 3: Repair and Sand
Fill gouges and nail holes with stainable wood filler, slightly overfilled. Once dry, usually 1 to 2 hours for small fills, sand flush.
Sand the whole chair with 100 grit to remove remaining finish and scratches, then 150, then 220. Always sand with the grain. For round legs and spindles, tear sandpaper into strips and use them like a shoeshine cloth. A sanding sponge handles curved backs well. Avoid power sanders on spindles; they flatten the profile.
Water rings that survive stripping often sit in the wood itself. Light sanding removes shallow ones; dark black rings may need oxalic acid wood bleach, or they are a good argument for paint.
Vacuum the dust and wipe with a tack cloth or a rag barely dampened with mineral spirits.
Step 4a: Stain and Clear Coat
If the chair is pine, maple, birch, or cherry, apply a pre-stain conditioner first. Those woods absorb stain unevenly and can look blotchy without it. Apply stain within the time window on the conditioner label, usually within 2 hours.
Test your stain on the underside of the seat. Wipe it on with a rag, wait 5 to 15 minutes, and wipe off the excess thoroughly. Longer waits give a darker color. Let stain dry fully, usually 8 hours or overnight for oil-based stain.
For the topcoat, wipe-on polyurethane is forgiving on a chair with many curves. Apply thin coats with a folded lint-free rag, letting each dry 2 to 4 hours, and buff lightly with #0000 steel wool or 320-grit paper between coats. Three to four coats is a good target for the seat, which takes the most wear. Let the chair cure for at least 72 hours before regular use, and up to a few weeks before it reaches full hardness.
Step 4b: Prime and Paint
If you chose paint, you can often skip stripping if the old finish is sound. Clean the chair with a degreaser, scuff-sand everything with 150 to 220 grit, and wipe off the dust. Apply a bonding primer, let it dry per the label, and sand lightly with 220.
Use a quality enamel. Water-based alkyd and acrylic-urethane enamels level well and cure hard. Apply two thin coats with a small brush, or use a spray finish for spindle-heavy chairs, holding the can 8 to 12 inches away and making light passes. Turn the chair upside down to paint the underside and legs first, then set it upright to finish the seat and back. Allow at least a few days of cure time before use.
Common Mistakes
- Refinishing before regluing. Glue squeeze-out on a fresh finish is hard to clean, and a loose chair will crack the new finish at the joints.
- Skipping the lead test. Sanding lead paint creates hazardous dust that spreads through a home.
- Cross-grain sanding. Scratches across the grain jump out once stain goes on.
- Thick topcoats. Heavy coats run, sag, and stay soft. Several thin coats always win.
- Leaving oily rags in a pile. Rags soaked with oil-based stain or finish can self-ignite. Hang them flat outdoors to dry or store them in a sealed metal can filled with water.
A refinished chair rarely costs more than $40 to $60 in supplies, and the skills transfer directly to tables, dressers, and nightstands. Once you have done one, a set of mismatched thrift chairs finished in the same color makes a charming dining set.