The floor of a typical two-car garage ends up holding everything except cars. Bikes lean against the water heater, rakes fall over when you open the door, and the bin of holiday lights blocks the path to the freezer. The walls, meanwhile, sit mostly empty. Moving storage up onto them is the fastest way to win back floor space, and it is very doable in a weekend.
The hard part is choosing a system. Here is how the three most common options compare, followed by a sample layout and a two-day install plan.
The Three Main Options
Pegboard
Pegboard is hardboard or metal panel with a grid of holes, usually 1/4 inch in diameter and spaced 1 inch apart. You hang hooks, bins, and small shelves wherever you like.
- Cost: Roughly $20 to $40 for a 4-by-8-foot hardboard sheet, plus about $20 to $40 for a hook assortment. Metal pegboard panels cost more but hold more weight.
- Strength: Good for hand tools and light items. Standard hardboard pegboard is not designed for heavy loads, and hooks can pull out of the holes when you lift a tool off.
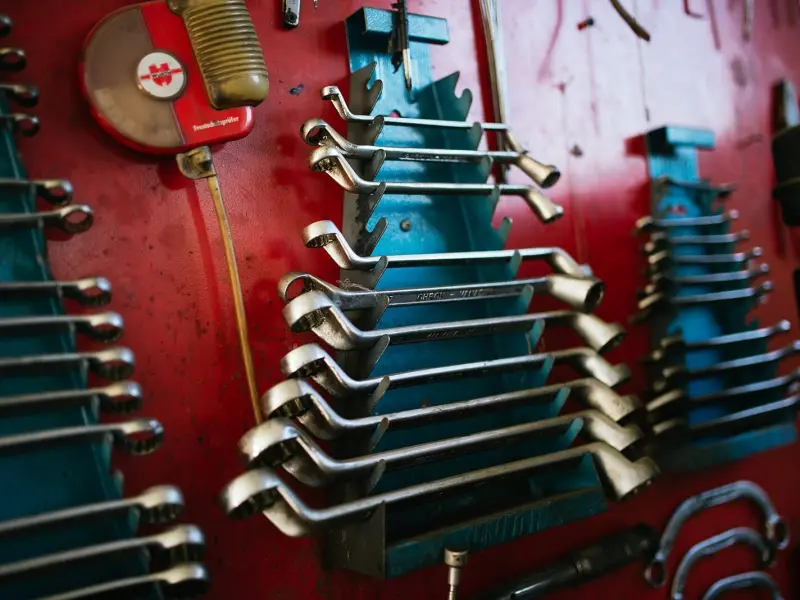
- Best for: A tool wall above a workbench, where you want to see every wrench and screwdriver at a glance.
- Watch out for: Pegboard must be mounted with a gap of about 1/2 inch behind it so hooks can seat. Furring strips or spacers handle this. Hooks also tend to fall out; plastic peg locks or zip ties fix that.
Slatwall
Slatwall is a panel, usually PVC in garages, with horizontal grooves that accept matching hooks, baskets, and shelves.
- Cost: Panels run roughly $3 to $6 per square foot, and accessories are often $10 to $30 each. A 4-by-8-foot section with a basic accessory kit can easily reach $150 to $250.
- Strength: Much stronger than hardboard pegboard. Properly installed into studs, many systems hold 50 pounds or more per hook, which handles bikes, ladders, and heavy garden tools.
- Best for: Bulky, awkward items like bikes, folding chairs, hoses, and long-handled tools.
- Watch out for: It is the most expensive per square foot, and accessories from one brand often do not fit another.
Shelving
Two common approaches: freestanding steel shelving units, or wall-mounted standards and brackets.
- Cost: A freestanding steel unit about 48 inches wide, 18 to 24 inches deep, and 72 inches tall runs roughly $80 to $200. Heavy-duty units are commonly rated for several hundred pounds per shelf. Wall-mounted standards and brackets cost less per foot and keep the floor beneath clear.
- Strength: The highest capacity per dollar of the three.
- Best for: Storage bins, paint cans, camping gear, and anything boxy.
- Watch out for: Depth. Shelves eat floor space, which matters along the sides where car doors open.
A Sample Layout for a Two-Car Garage
Two-car garages vary, but many are roughly 20 to 24 feet wide and 20 to 24 feet deep. Here is a layout that works for a lot of them:
- Back wall (facing the cars' bumpers): A run of three freestanding steel shelving units, each about 48 inches wide and 18 to 24 inches deep, for labeled storage bins. Put heavy bins on the bottom two shelves and seasonal decor on top. In front of the cars, there is usually room for this depth.
- One side wall, near the house door: A 4-by-8-foot pegboard section above a workbench or sturdy table, at a working height of about 36 inches. This becomes the tool wall.
- Other side wall: An 8-foot run of slatwall, mounted about 18 inches off the floor and running up to about 6 feet. Use it for rakes, shovels, brooms, the hose, bikes on vertical hooks, and sports gear in wire baskets.
- Above the garage door or near the ceiling: Optional overhead racks for rarely used items, if your ceiling height allows. This is a bigger project and is best left for a second weekend.
Keep side-wall storage shallow, ideally under about 12 inches deep, wherever car doors open. Most people need around 30 inches of clearance to open a car door and climb out comfortably.
What You'll Need
- Stud finder, 4-foot level, tape measure, chalk line, and pencil
- Drill/driver and an impact driver if you have one
- 2-1/2 to 3-inch exterior-grade or structural screws for wood studs
- Masonry anchors and a hammer drill if any wall is concrete or block
- 1×3 furring strips for pegboard
- Circular saw or a store that will cut panels for you
- Safety glasses, work gloves, and a dust mask
- A sturdy step ladder
Weekend Install Plan
Saturday: Clear, Clean, and Mount the Big Pieces
- Empty the walls and sort. Pull everything into the driveway and sort it into keep, donate, and trash. Old paint can usually go to your local household hazardous waste program; never pour it down a drain.
- Sweep and wipe down the walls. Dust and cobwebs make it hard to mark lines and find studs.
- Locate and mark studs. Most garage studs are 16 inches on center. Mark each with painter's tape at the heights you will be mounting.
- Set up the shelving units on the back wall. Even freestanding units should be anchored to the wall with the included straps or an L-bracket into a stud so they cannot tip.
- Install the slatwall. Mount the first panel level, screwing into every stud according to the manufacturer's spacing. Interlock the next panels above it.
Sunday: Tool Wall and Final Placement
- Mount furring strips for the pegboard. Screw 1×3 strips horizontally into the studs at the top, middle, and bottom of where the panel will hang.
- Screw the pegboard onto the strips, using washers under the screw heads so they do not pull through.
- Hang tools by frequency. Your most-used tools go at eye level within arm's reach of the workbench. Trace each tool's outline with a marker so everyone knows where it returns.
- Load the slatwall and shelves. Hang heavy items low, light items high.
- Label the bins on the shelving with the category facing out.
Safety First
- Always fasten to studs or rated masonry anchors. Drywall alone will not hold loaded storage.
- Use the ladder correctly. Keep three points of contact, never stand on the top cap of a step ladder, and have someone nearby when lifting panels overhead.
- Store chemicals carefully. Keep pool chemicals, pesticides, and fertilizers on low, separate shelves out of kids' reach. Store gasoline only in approved containers and away from appliances with a pilot light or flame, such as a gas water heater.
- Keep heavy items low. A 40-pound bin on a top shelf is a hazard to whoever pulls it down.
Common Mistakes
- Buying slatwall for small hand tools that pegboard handles for a fraction of the cost
- Hanging pegboard flat against the wall with no gap, so hooks will not seat
- Placing deep shelves where car doors open
- Leaving freestanding shelves unanchored
The Payoff
Mixing systems is the budget-friendly answer: shelving for bins, pegboard for small tools, and slatwall for the bulky stuff. Done in a weekend for roughly $300 to $600 in a typical two-car garage, it can clear enough floor to finally park both cars inside. After that, a workbench upgrade or overhead racks make good next projects.