If your family comes and goes through one door, you already know what piles up next to it: backpacks, sneakers, a jacket draped over a chair, and a stack of mail nobody has opened. A mudroom with built-in lockers would solve it, but most homes do not have one. What many do have is a coat closet a few steps from the door, usually holding a single rod of rarely worn coats and a jumble of shoes on the floor.
With a weekend and a modest budget, that closet can become a drop zone that gives every person a spot for the things they carry in and out each day.
Why Hooks Beat Hangers
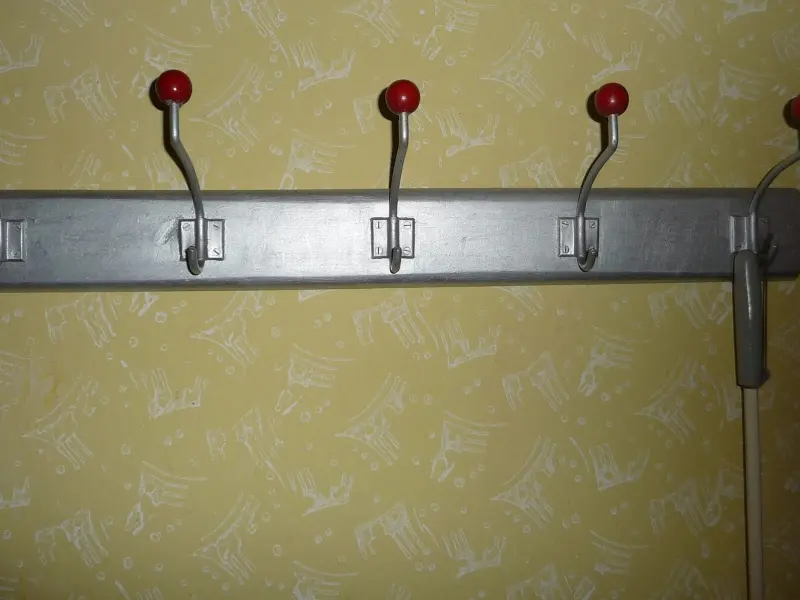
A hanging rod works for formal coats. It does not work for a 9-year-old coming home from school. Hangers take two hands and a little patience, so jackets end up on the floor instead. Hooks take one hand and no thought. The core idea of a drop zone is to make putting things away faster than dropping them.
Plan Before You Buy
Measure the Closet
Typical reach-in coat closets are about 24 inches deep and anywhere from 30 inches to 6 feet wide. Write down:
- Interior width, wall to wall
- Depth, from back wall to door frame
- Height to the existing shelf, and from the shelf to the ceiling
- Width of the door opening, which can be narrower than the closet itself
- Whether the door swings out, slides, or bifolds
That last item matters. A bifold door eats several inches on each side when open, which can block hooks or bins in the corners. Some families remove the door entirely and use the closet as an open nook, which works well if the closet is in a hallway rather than a living room.
Make a List of Who Uses It and What They Carry
For each person, list the daily items: coat, backpack or work bag, shoes, hat and gloves, sports gear, keys, and anything that needs to leave the house the next morning. Seasonal items, like the heavy winter coats that only come out in January, belong somewhere else most of the year.
Sketch Zones
A practical layout from bottom to top:
- Floor (0 to 18 inches): boot tray and shoe rack
- Low hooks (about 36 to 42 inches high): kids' backpacks and jackets
- Adult hooks (about 60 to 66 inches high): adult coats and bags
- Shelf (about 60 to 72 inches): one labeled bin per person for hats, gloves, scarves, and sunglasses
- Upper shelf or top of the closet: off-season gear and spares
- Back of the door, or a side wall: mail sorter and a small key rack
If the closet is narrow, keep the original rod only in one section for a few longer coats, and turn the rest into a hook wall.
What You'll Need
- Stud finder, tape measure, level, and pencil
- Drill and driver with bits
- Hook rail or individual heavy-duty hooks (rated for at least 15 to 25 pounds each)
- Wall anchors rated for the weight, for spots where you cannot hit a stud
- A 1×4 or 1×6 board, cut to the closet width, for mounting hooks (optional but recommended)
- Paint or stain for the board
- Two-tier or three-tier shoe rack sized to the closet width
- Waterproof boot tray, about 15 by 30 inches
- Fabric or plastic bins sized for your shelf
- Wall-mounted mail sorter or file pockets
- Label tags or a label maker
Budget roughly $75 to $200, depending on whether you build a hook board or buy hardware, and how many bins you need.
Building It, Step by Step
- Empty the closet completely. Pull out every coat, shoe, and mystery bag. Donate coats that no longer fit and move seasonal items to a bedroom closet or a bin in the basement or garage.
- Remove the rod, or relocate it. Most rods sit in plastic or metal sockets held by two screws on each side. Unscrew them and patch the holes with lightweight spackle if they will show.
- Patch and paint if needed. Closet walls take a beating. A coat of scrubbable satin or semi-gloss paint makes scuffs from wet boots and backpack buckles easier to wipe off. Allow at least a few hours of drying time, and ideally overnight, before hanging anything.
- Mount a hook board. Rather than driving individual hooks into drywall, attach a painted 1×4 or 1×6 board across the back wall, screwing it into at least two studs with 2-1/2-inch wood screws. Studs in most US homes are spaced 16 inches on center. Then attach hooks to the board wherever you want them, with no worry about anchors. Mount a second board lower for children.
- Space hooks about 8 to 10 inches apart. Bulky winter coats and backpacks need room. Crowded hooks lead to items piled on top of each other.
- Set the floor up for wet gear. Place the boot tray against one side, where snowy or muddy shoes can drip. Put the shoe rack on the other side for dry everyday shoes. In rainy or snowy climates, leave the closet door ajar for an hour after everyone comes in so things dry out.
- Assign bins on the shelf. One bin per person, labeled with names or, for young kids, a photo. Bins keep small items from falling behind the shoe rack never to be seen again.
- Install the mail spot. A wall-mounted mail sorter inside the closet door or on the wall right beside the closet catches incoming mail before it lands on the kitchen counter. Add one slot labeled "Out" for things that need to leave the house: library books, permission slips, and returns.
- Add a small key hook or tray at adult height, near the door.
Safety Notes
- Always find studs or use anchors rated for the load. A hook rail loaded with three wet winter coats and a backpack full of textbooks can easily exceed 50 pounds.
- Before drilling into any wall, check for electrical cables or pipes. Outlets and switches nearby are a clue that wiring runs in that stud bay. Stud finders with an AC-detection mode can help.
- If you are adding a charging station, use a plug-in power strip with surge protection rather than extending wiring yourself. Hardwiring a new outlet in a closet is a job for a licensed electrician in most jurisdictions.
Tips for Making It Stick
- Give every item one home. If backpacks go on the low hooks, they always go there. Consistency is what turns the setup into a habit.
- Keep it lean. Each person gets one or two hooks and one bin. When the hooks are full, something needs to move to a bedroom closet.
- Do a five-minute Sunday reset. Return stray items, empty the mail sorter, and match up lost gloves.
- Rotate with the seasons. Swap out winter boots and heavy coats for rain gear and sandals in spring.
Common Mistakes
- Hanging hooks too high for the kids who are supposed to use them
- Putting a closed bin under the hooks, where it fills with whatever falls off
- Skipping the boot tray and ending up with a water-stained closet floor
- Keeping every coat the family owns in a closet meant for daily use
Wrapping It Up
A drop zone works because it puts the most common items exactly where people already drop them, only off the floor. Measure the closet, plan zones by height, mount a sturdy hook board into studs, and give each person a bin and a spot for shoes. When it's done, the hallway floor stays clear and the morning scramble gets shorter. The garage entry or the back door can usually take a smaller version of the same setup.